Saturday, February 26, 2011

I love the Zoo

I really do love the zoo. I get so excited, especially when the orangutans are playing instead of being their usual lazy selves. So I was squealing with joy when I opened a package this week from The Little Fabric Shop and beheld these two fabrics from The Alexander Henry Fabrics Collection:

2-d Zoo & Teeny Tiny Zoo in Pool


These bright fabrics will be used for a custom ordered baby quilt for my sister's friend. (I'm even having a hard time writing this post because I keep scrolling up to look at these adorable little guys.) These fabrics are perfect for a little boy's quilt since it's hard to find fabrics without flowers or girly things being somehow involved unless you go with cars, polka dots or stripes. And more than the gorgeous colors and well-designed print, my heart melts for the "teeny tiny" animals.


Hello, tiny hippo! Good afternoon, tiny giraffe! You're looking fierce today, tiny tiger. Tiny anteater, I hope you're finding some delicious microscopic ants.

Ah, my new friends.

I just might cry when I have to start (cover your ears, tiny animals!) cutting into them next week.

Wednesday, February 23, 2011

One Step Forward, Three Steps Back

I know, you're probably saying, "Where's the baby quilt you promised us?" Well, the problem is that when you're learning a new art, especially one as complicated and precise as quilting, you're bound to make some big (read "stupid") mistakes. Shucks! I thought that after three quilts I'd reach perfection. Okay, maybe not, but close. I'm not a patient person. Here's the story...

Last week I was flying through this quilt. On Saturday as you know, I pinned away on my kitchen floor and started a bit of quilting. I was excited to be quilting again. My stitches are coming along, thanks to Rita over at Red Pepper Quilts (which is one of my favorite quilting blogs, just amazing!) who mentioned that she uses a stitch length of 4.0 instead of the 1.6 I was using. What a huge difference in stitch quality. My lines are getting straighter. Things were really looking great...that is, until I turned the quilt over and I saw this....


Oh, the horror!

I admit, not happily, that if it weren't for my lovely husband, this quilt would probably have stayed that way. I intend to sell this quilt on Etsy (and after this post, "try to sell" might be more accurate) but instead of thinking about fixing the problem, I instantly started thinking, "Okay, well would someone pay forty dollars for this quilt? Thirty?"

Enter Mr. Side Stitches noticing my gloomy disposition. He didn't let me get away so easily and simply said that if I plan to sell it, I should aim for perfection.

Enter Mrs. Seam Ripper. She's lovely and pink and we spent a lot of time together this week.

I ripped many seams, unsafetied many pins, scrapped my horribly pieced back panel and began cutting again, very straight this time. I'm not done yet, so I don't want to ruin the big reveal, but my new back puts the old back to shame. No yikes moments.

I would just like to say though, that while going through this slightly annoying process, I'm also thankful that somehow the Lord led me to quilting. It challenges me in some very good ways.

1.) Quilting requires patience. I get impatient when my husband uses the sink to wash his face when it's clearly the next step in my nightly routine.
2.) Quilting requires precision. I'm the classic B student; as little effort as possible for an acceptable outcome.
3.) Quilting requires practice. What, I'm still not as good as Rita after three quilts?! I quit!
4.) Quilting requires perseverance. See Quilting requires practice.

I rejoice because even though quilting has been a challenge and is at times tedious, I still really love it.  I look forward to sitting at my sewing machine for hours at a time and sewing lots of fairly straight lines. And like all good artists, I'm even learning to enjoy the painful editing process.

Saturday, February 19, 2011

Deer Valley Quilt in Progress

Just a quick picture to let you know that I've been working! 

Beet and Goat Cheese Tart for Valentine's Week

It breaks my heart that the beet, that exquisitely magenta root vegetable, sweet, earthy, unspeakably delicious, is hated by millions. Poor beets. I blame it on those pickled beets that appear in buffet salad bar lineups. Don't get me wrong, pickled beets can be okay, but if you've never had a roasted beet, then you've never had a beet.

To keep this unloved, but lovely, root vegetable from having the Valentine's blues, I invited it to dinner. Meet the Beet and Goat Cheese Tart.


Two of these stunning pink tarts accompanied me to our Bible study dinner last night and while most people thought it was a dessert upon first glance, it went over well once that confusion was cleared up. Of course there were still the beet-avoiders who passed it over, but my husband and I were okay with that since it meant that we got to take home some leftovers.

This is a simple recipe, minus the crust which can be a little bit time consuming. Don't be overwhelmed though, I have some short cuts.

Beet and Goat Cheese Tart
Adapted from Orangette

One Flaky Pie Crust (see below for recipe)
2 medium-sized beets
3 large eggs
4 oz. chevre goat cheese, broken into small pieces as best as you can
3/4 cup milk (I used 1%)

Let's start at the beginning for those who have never roasted beets before. Preheat your oven to 400 degrees. Take your two lovely red beets (if they have stems, twist those off and use them later like you would use chard or spinach) and wash them up well. Then wrap each beet in foil and put them in the oven. Let them roast for about 45 minutes -1 hour. You might consider putting a cookie tray under them because sometimes they leak juice and your house fills with burning beet smells (yes, I speak from experience). Check them around 45 minutes by sticking a fork in them to test their tenderness. There should be little to no resistance on your fork. Take them out and let them cool for a few minutes on a plate. If I'm in a hurry, I'll let them cool just a bit, but will then peel them under cold running water while they're still warm so I don't burn myself. If the beet is cooked well, you should be able to peel the skin off easily with the side of a spoon.

While your beets are in the oven, you can get your crust started. You can also pre-bake your crust the night before and just fill and bake it the day of your event if you're pressed for time (See below for crust directions)

When your crust is ready to be filled, preheat the oven to 350. Slice the cooled and peeled beets into 1/4 inch slices and arrange them in one layer in the bottom of your pre-baked pie crust. Mix up the 3 eggs, milk and crumbled goat cheese in a small bowl. Pour the egg mixture over the beets and make sure the cheese chunks are evenly distributed over the top of the tart. Bake the tart for about 30 minutes until it's cooked through and pretty firm to the touch. Serve warm or at room temperature.

Flaky Pie Crust
Adapted from Mark Bittman's How to Cook Everything

1 cup plus 2 T. flour
1/2 t. salt
8 T. cold butter
3 T. ice water

In a food processor, combine flour and salt. Pulse for 10 seconds until combined. Cut butter into 8 pieces, add them to the food processor, and turn it on until the butter is well combined and you can't see any chunks. Then through the top hole, start adding the water a tablespoon at at time. You may have to add a bit more water, but 3 T. usually works for me. Add water a little at a time until the dough comes together. The dough will be soft, but should come together in a ball in the food processor. Take the dough ball out and wrap it in plastic wrap. Freeze the ball for 10 minutes. When it's chilled, roll it out on a lightly floured surface until it's big enough to drape over a 9" pie dish. Press the dough lightly into the bottom of the pan and cut the dough with about an inch of overhang. Now tuck the excess dough under the outside edge of the crust and flute or fork the edge. Bittman gives some good examples of this in his cookbook. Stab the dough all over with a fork and put it back in the freezer for 30 minutes.

Preheat the oven to 425 degrees. Spray the back of some aluminum foil with some spray oil or rub it with butter. Put the foil spray-side down in the pie crust and fill the foil with beans or rice (I reuse the same rice for my pie weight so I don't waste so much). Pre-bake the crust for 12 minutes, then remove the foil and bake another 3 minutes. Take it out and let it cool for a few minutes. Now it's time for the filling.

A note on this pie crust: I use this pie crust for everything from quiche to pumpkin pie (add 1 T. sugar to the flour and salt mixture for sweet pies). The crust is so flaky and, of course, has an amazing buttery flavor. I used to hate pie crust, but Mark Bittman has created a pie crust that compliments whatever it's holding in. Farewell the days of store-bought pie crusts!

Wednesday, February 16, 2011

Deer Delivery

Last week I received a package from Hawthorne Threads (my favorite website for drooling over designer prints) containing these beautiful fabrics from Joel Dewberry's line Deer Valley:


As most of my friends know, I have a weakness for aqua and brown, but I have a serious fondness for the rust in that gorgeous architectural print. I haven't had as much time this week to quilt as I would have liked, but I have a plan and all of my pieces for the quilt top cut. I'll start piecing tonight. I'm excited to get back to quilting again after a month's hiatus. I'm realizing that being a novice quilter is made much more difficult because of my meager scrap collection. Every time I want to make a quilt, I have to buy all new fabrics. I know that somewhere down the line, I'll be able to make entire quilts out of my long collected scraps, but for now, I'm mostly sticking with one fabric collection at a time and buying as I go.

Here are two of my previous quilts to hold you over until I make some progress with my Deer Valley baby quilt:

This was my mom's birthday present. A lap quilt made from one of my favorite collections, Heather Bailey's Pop Garden. These bold florals take me back to those days of vintage sheets, trundle beds, and shared bedrooms. I have to say, I was tempted to keep this one for myself.


For my sister's birthday, I made her a quilt out of Anna Maria Horner's Innocent Crush. These fabrics are fun, bold, and funky. A perfect collection for my sister.


The gold fabric is my favorite part and also made up the binding. 

I'm glad to have added bits of these gorgeous prints to my dear little scrap collection. 

Saturday, February 12, 2011

My Sunday Morning Cookie

A few weeks ago I was looking through one of my favorite food blogs, Orangette, when I came across these, Kim Boyce's Whole Wheat Chocolate Chip Cookies from her cookbook, Good to the Grain.


I had seen these a few months ago and put them at the back of my mind, but perhaps too far back because I had forgotten them completely until I stumbled upon them again. Silly me! If only I'd known. When I finally had my hands on the book, I was in love. The pictures are gorgeous, the recipes are drool-worthy, and Kim Boyce writes in a way that makes you believe that you too can create beautiful and delicious baked goods out of whole grains. My favorite part is that while Kim desires to create healthier recipes using different whole grains, her goal is to bring out the unique and full-bodied flavors of the different whole grains. She believes that the flavors of whole grains can actually enhance the flavor of pancakes, muffins, cookies, tarts, and breads. And after trying her Whole Wheat Chocolate Chip Cookies last week, I'm a believer.

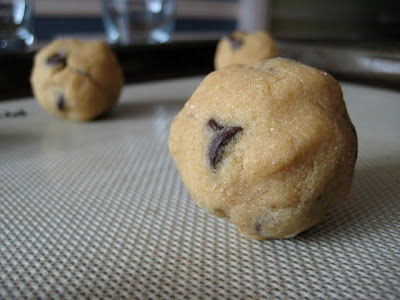
Last Sunday I was on refreshment duty for church so I whipped up a batch of these Sunday morning. Now, just because these cookies are made with 100% whole wheat, it doesn't exactly make them healthy. Two sticks of butter and two cups of sugar later, these cookies are anything but fat free. But as I said, Kim is about flavor, not weight loss, and that's why I love her recipes. You might just have to share more of them. After mixing the dough up though, I was trying to figure out how to not share any of these. Besides the melt-in-your-mouth nutty flavor of the dough, the kosher salt sealed the deal. Why didn't I think of that before? Big chunks of salt that burst in your mouth intensifying the salty/sweet dynamic like no other cookie I've made. Kim, that was brilliant! I couldn't keep my fingers out of the dough while I was baking up these cookies. But really, can you blame me?


See the glittery salt?


I, like Orangette, used white whole wheat flour because that's what I had in my pantry, but I would love to try these with a traditional whole wheat. And I clearly used chocolate chips instead of the suggested chopped chocolate. I'm planning on making another batch this Sunday for some friends and my pastor who missed out last week after the swarming locusts that are our youth group kids (and my husband). Plus, I could eat another one or two. The final result is a big, crunchy on the outside, chewy on the inside, beautifully crack-topped cookie.


For those of you wondering if your picky children or husbands will reject these whole wheat cookies, stop. After my husband took a bite of one of these, he said, "Is this supposed to taste different than a regular cookie?" I just smiled. I think they do taste different, more flavorful and everything I would want in a cookie, but not the dense brick that most people associate with 100% whole wheat. I can't wait to get my fingers on more dough tomorrow and my hands on more unique flours like quinoa, spelt, and teff so I can try more of these Good to the Grain recipes.