I’ve been taking this
241 tote slowly. It actually took me awhile to get up the guts to start cutting because I don’t have much experience with bag construction and though the pattern is very clear, I was still just a little intimidated. And to make things worse, I really wanted to go the zippered-pocket route. After all, I live in the city and don’t want all my stuff hanging out in those open side pockets (through they are cute). I’ve never sewed a zipper on anything though and I was nervous! I ordered 10 zips from
Zipit (at
Anna’s recommendation) in 5 different colors to audition and landed on the lovely eggplant. Then there were no longer any excuses, I had to get started. I decided that I would use the interfacing since I’m doing all the work any ways and I might as well make it sturdy, right?
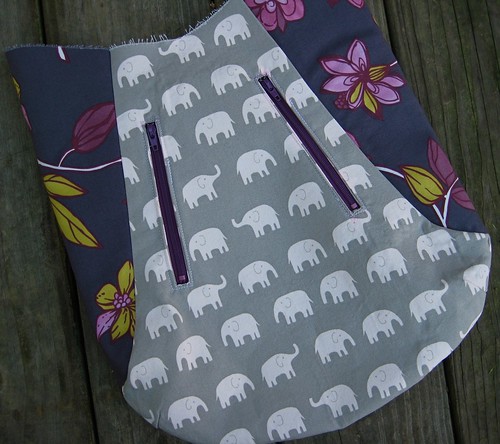
Everything was going along splendidly, except I didn’t really think through my marking tool. I used my brand new blue Crayola Washable Marker because I wanted to try their wash-ability on something small before I attack a whole quilt with them. So I made my bold blue marks, but slowly started being haunted by fears that they wouldn’t wash out, especially as I ironed the marks a few times and I know that can set some inks. So after I finished the center panel and got my pockets all in and, hooray, my zippers on without too much to-do, I took it to the sink and started rinsing. Some of the ink came out, but not all of it. Then I started getting really nervous and threw it in the wash for a quick cold wash. Thankfully, the blue marker did come out beautifully, but my fabric was also bubbled away from the interfacing and sadly, my purple zippers had bled some pink dye onto my cute white elephants. Boohoo!
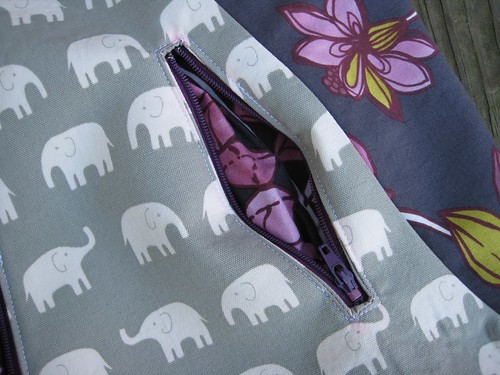
All that to say, I’ve learned three very important lessons already and have only finished the exterior! Important lessons learned: 1) use a marking tool which will come out either with a good steam, with a damp cloth, or use a
hera marker; 2) only spot clean the tote (though most of the bubbles did smooth out when I ironed it); and 3.) pre-soak the zippers, especially if they are dark and are of the red family (silly red dye!) That’s my little bit of novice wisdom to pass on to you.
But despite the pink smudges and the wrinkly fabric, I'm still pretty in love with it. How could you resist those elephants? I'm excited about using my new tote, once it is officially a tote. If I get my rear in gear, I should have it done this weekend.
Thank goodness for first time mistakes that make second attempts all the more sweet.

Oh my goodness, I didn't know that zippers could run! I'm sorry you had to learn that the hard way for the rest of us. I also have this pattern and am getting ready to make a bag. I'll be sure to use my Frixion pen instead of my beloved Crayola's for this project. In fact, I'll need to make a note about this on my Crayola post. All of that aside, your bag looks sensational! And your zippers look just perfect! I love it :-)
ReplyDeleteI'm embracing a new attitude of no fear-living. I think it could have applications to your tote project. I encourage you to fearlessly cut and mark top your heart's content. You are yet learning the craft.
ReplyDeleteHow annoying- double, even triple trouble! i have had those blue markers not completely wash out too, I use the Frixion pens, chalk, pencil and hera markers instead. Love the elephant print on the front though!
ReplyDeleteHum, I'll have to try those. But my blue markers did wash out perfectly! It was just that I didn't know the zippers would run a bit. But I still love my bag! I finished it and will be posting pictures soon!
ReplyDelete